
Table of Contents
- Why Regular Cleaning Matters for Your Hydrogen Water Generator
- What You'll Need Before Starting
- Step-by-Step Bottle Cleaning and Body Maintenance
- Hydrogen Water Generator Descaling with Vinegar and Citric Acid
- How Often to Clean a Hydrogen Water Bottle
- How to Remove Odor from a Hydrogen Water Bottle
- Protecting Electrical Components and the Hydrogen Generator Compartment
- Troubleshooting After Cleaning: Performance Checks and Common Issues
- Frequently Asked Questions
Last Updated: October 14, 2026
Why Regular Cleaning Matters for Your Hydrogen Water Generator
A clean hydrogen water generator uses electrolysis to produce molecular hydrogen-rich water. Over time, mineral deposits build up inside, reducing performance and damaging the electrolysis plate and electrodes.

Regular maintenance keeps your generator at full capacity and extends its life.
Neglect causes reduced hydrogen production, slower charging, and odors. A quick cleaning routine prevents all of these.
What You'll Need Before Starting
Gather these supplies before cleaning your clean hydrogen water generator:
- Soft-bristled brush or non-abrasive sponge
- Mild dish soap
- White distilled vinegar or citric acid powder
Avoid harsh chemicals, abrasive scrubbers, or scouring pads, they damage the bottle body and seals. Never immerse electrical components; the charging port and generator compartment must stay dry.
Keep your manufacturer's instructions nearby, as models vary. Hydrogen Living offers model-specific care guides on our product pages and through our free consultation service.
Step-by-Step Bottle Cleaning and Body Maintenance
Cleaning the bottle body and cap
Empty any remaining water and rinse the bottle with warm filtered water to loosen debris.
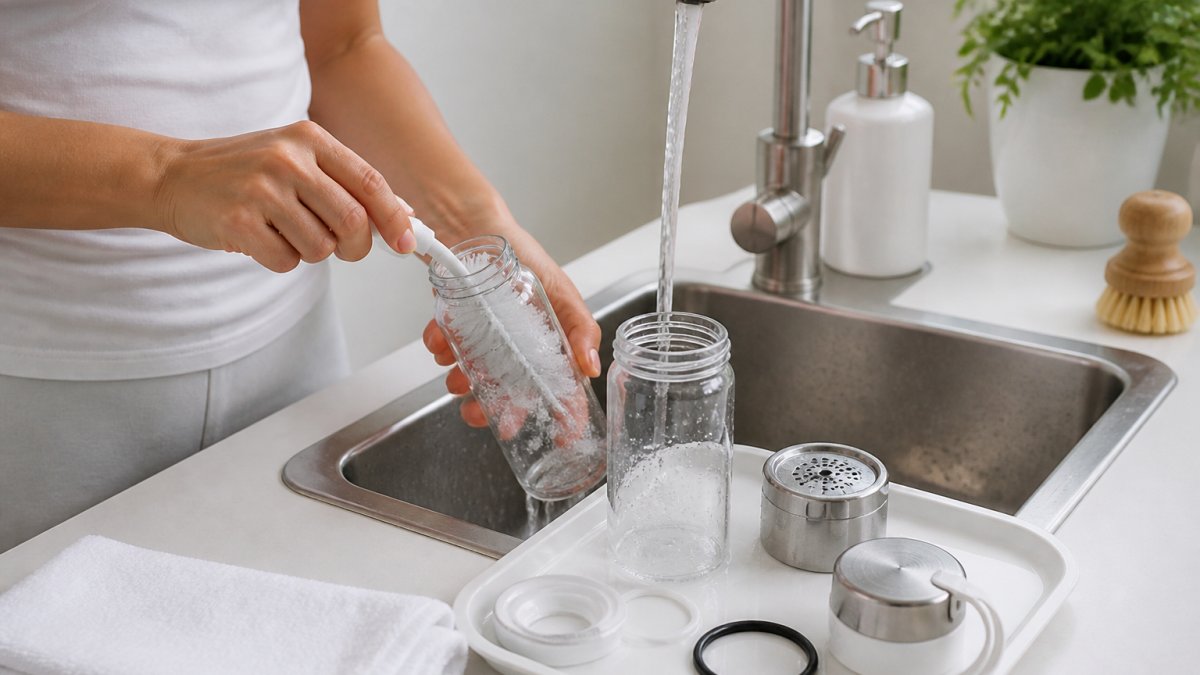
Fill halfway with warm water and a few drops of mild dish soap.
Wipe the cap and lid exterior with a damp cloth, removing mineral deposits from the threading.
Scrub the bottle exterior with a soft cloth and warm soapy water, then dry immediately with a lint-free cloth to prevent water spots.
Rinsing after cleaning
Rinse thoroughly with filtered water until no soap residue remains, then empty completely and shake out excess water.
Rinse the cap and gasket separately under warm running water until soap-free, then dry the cap completely before reattaching.
Never soak the charging port or generator compartment, these must stay completely dry. If water enters, air dry the device for at least 24 hours before use.
Hydrogen Water Generator Descaling with Vinegar and Citric Acid
Mineral buildup is the biggest threat to your hydrogen water generator's performance. Two safe solutions remove it: white vinegar and citric acid.
Using diluted white vinegar for mineral deposits
White distilled vinegar's acetic acid dissolves mineral deposits without harming the bottle or generator components.
Mix one part white vinegar with three parts filtered water, strong enough to clean, gentle enough for regular use.
Pour the solution into your hydrogen water bottle and let it sit 30 to 60 minutes, or up to 2 hours for heavy buildup.
Scrub the interior with a soft brush, focusing on the bottom and sides where scale accumulates.
Citric acid as an alternative descaling solution
Citric acid removes mineral deposits faster than vinegar and leaves no lingering smell.
Dissolve one tablespoon of citric acid powder in one cup of warm filtered water, pour into the bottle, and soak 30 minutes.
For stubborn deposits, soak up to one hour, scrubbing gently with a soft brush.
Both solutions are safe for the bottle body, cap, and seals.
How Often to Clean a Hydrogen Water Bottle
Cleaning frequency depends on three variables: usage, water content, and how the device looks and performs. Use the schedule below as a starting point, then adjust with the validation checks further down.
Baseline schedule by usage
| Usage | Filtered or distilled water | Tap water |
|---|---|---|
| 1-2 times per week | Every 2-3 weeks | Every 10-14 days |
| 3-5 times per week | Every 10-14 days | Every 5-7 days |
| Daily | Once per week | 2-3 times per week |
These intervals assume you empty and air-dry the bottle between uses. If water sits overnight or for days, shorten the interval.
How water quality changes the schedule
Water is the main source of the minerals that become scale.
Hydrogen Living Molecular Hydrogen Water Generator | PEM + SPE Technology RO 3 →
- Distilled water: essentially mineral-free; buildup is slow, so stay at the long end of the schedule.
- Filtered water (carbon or pitcher): removes chlorine and some sediment but leaves calcium and magnesium. Treat it like tap water.
- Reverse osmosis (RO) water: very low mineral content, similar to distilled. If your RO system remineralizes, treat it like filtered water.
Practical rule: if you can see or feel residue, you waited too long. Cleaning is easier when scale is thin.
Validation checks: how to know it is time to clean
Do not rely on the calendar alone. Run these checks weekly:
- Visual: hold the empty bottle to a light. Look for white or cloudy film on the interior wall, lid threads, and gas vents.
- Tactile: a slick or gritty feel on the interior wall indicates biofilm or mineral film.
- Smell: a musty, stale, or metallic odor after air-drying means it is past due.
- Taste: flat, metallic, or slightly sour water means clean before the next use.
- Performance: if cycles take longer or the indicator behaves differently, clean and re-check before assuming the device is failing.
Special situations that require immediate cleaning
- You used anything other than water (electrolyte packets, flavor drops, tea, juice), sugars and acids accelerate biofilm and damage seals.
- Water sat in the bottle more than 48 hours.
- You stored it with the lid sealed and the interior damp.
What not to do
Do not over-clean, daily scrubbing and repeated acid soaks degrade gaskets and dull the interior finish. Match intensity to what you see: a light rinse and air dry for daily use, a soap wash after heavy use, and a vinegar or citric acid descale only when you see or feel mineral film.
A simple maintenance rhythm
- After every use: empty, rinse with filtered water, air dry with the lid off.
- Weekly: run the visual, tactile, and smell checks.
- Every 1-3 weeks (by water type and usage): full soap wash and rinse.
Adjust the rhythm, not the principles: clean more often with hard water, heavy use, or a bottle that sits wet; stretch intervals with distilled water and light use.
How to Remove Odor from a Hydrogen Water Bottle
Unpleasant odors usually signal mineral buildup or bacterial growth. The fix: deep clean with vinegar or citric acid.
For persistent odors, repeat with citric acid: dissolve two tablespoons in one cup of warm water, soak 2-3 hours, scrub, and rinse well.
Always use filtered or distilled water in your hydrogen water generator, tap water's minerals and impurities create odors faster.
Protecting Electrical Components and the Hydrogen Generator Compartment
The electrolysis cell, electrode plates, charging port, and generator housing are the parts most easily ruined by cleaning. The practical question: which parts can touch water, and which cannot?
Map your device before you clean it
Hydrogen water generators are not built to one standard. Before cleaning, identify these zones on your model:
- Wetted path: interior bottle wall, lid interior, and removable drinking spout, designed to contact water.
- Sealed generator module: the base or cap housing the electrolysis cell and electrode plates. Sealed against splashes, but not designed for immersion or soaking.
- Charging port: USB-C, magnetic pogo pins, or covered DC jack, must never contact liquid.
If your manual does not label these zones, assume the generator module and charging port are not immersible. Typically only the bottle body and lid interior are user-cleanable; everything else is wipe-only.
Immersible vs. wipe-only: a quick decision rule
| Part | Typical cleaning method |
|---|---|
| Bottle body (glass, Tritan, or stainless interior) | Rinse and wash with mild soap |
| Lid exterior and threading | Wipe with damp cloth |
| Removable gasket or O-ring | Remove if the manual allows, rinse, air dry |
| Generator module / base | Wipe exterior only |
| Charging port | Dry soft cloth only; never wet |
| Electrode plates | Do not touch; follow manual |
Remove parts only if the manual says they are removable; never pry. Stretched or backward-reinstalled gaskets are a leading cause of leaks into the electronics.
Keep the charging port and generator dry
- Disconnect power and unplug any charging cable before cleaning; never clean a charging device.
- Never fill above the maximum fill line, overfilling pushes water into the gas vent and, on some models, the generator housing.
- Do not submerge the generator module, even briefly in clean water; splash-rated seals are not rated for immersion.
What to do about the electrode plates
On most consumer models, the electrode plates sit behind a sealed barrier and are not user-serviceable. Do not scrub them, soak them in vinegar or citric acid, or insert anything through the gas vents. If you suspect scale on the plates, contact the manufacturer or an authorized service provider, cleaning the cell yourself is a common way to void a warranty.
Check seals and gaskets monthly
Inspect the lid gasket, spout seal, and any O-rings where the bottle body meets the generator module. Look for:
- Cracks, flattening, or a chalky white film
- Gaps where the gasket no longer sits flush
- Water weeping past the seal during a normal cycle
Replace worn gaskets with manufacturer-supplied parts, generic O-rings may fit but often do not match the original durometer or thickness, allowing water into the electronics.
Model-specific reminder
Cleaning instructions vary by brand and model: some allow the lid interior to be rinsed, others are wipe-only; some use a removable electrolysis cartridge, others seal the cell permanently. Always check your manual or the manufacturer's current online guide before applying any method here. When in doubt, wipe rather than soak, and dry rather than rush.
Troubleshooting After Cleaning: Performance Checks and Common Issues
Slower charging time after cleaning: Water likely didn't rinse completely from the generator compartment.
Weak hydrogen production: Mineral deposits may remain on the electrolysis plate.
Water tastes sour after cleaning: You didn't rinse thoroughly enough.
Cap won't seal properly: Check that the gasket is seated correctly.
If problems persist, reach out to us.
Frequently Asked Questions
How often should you clean a hydrogen water generator?
Daily rinsing after use helps prevent mineral buildup and odor. A deeper clean with vinegar or citric acid descaling should happen every 2-4 weeks, depending on your water type. Hard water areas require more frequent descaling. Always follow your manufacturer instructions for your specific model to maintain optimal hydrogen production and device performance.
Can you use vinegar to clean a hydrogen water generator?
Yes. Diluted white vinegar is an effective and safe cleaning solution for hydrogen water bottles and generators. Mix equal parts white distilled vinegar and warm water, soak affected areas for 30 minutes to 1 hour, then rinse thoroughly. Avoid immersing electrical components or the charging port. Vinegar's acetic acid dissolves mineral deposits without damaging seals or gaskets when used properly.
What should you do if your hydrogen water generator stops working after cleaning?
First, ensure all components are completely dry before reconnecting power to the charging port. Check that the bottle cap and seals are properly seated. If the electrolysis plate or electrode appears damaged, do not use the device. Verify water has fully drained from the generator compartment. If performance doesn't return, contact the manufacturer or book a consultation before attempting further cleaning.
How do you remove odor from a hydrogen water bottle?
Soak the bottle in a mixture of equal parts white vinegar and warm water for 1-2 hours, or use a citric acid solution (1 tablespoon per cup of water). For stubborn odors, add baking soda to the vinegar solution. Rinse thoroughly with filtered water and air dry completely. Regular daily rinsing and allowing the bottle to air dry prevents odor buildup. Avoid harsh cleaners that can damage seals.
Proper maintenance is the difference between a hydrogen water generator that works reliably for years and one that fails prematurely. Regular cleaning takes just 15-20 minutes and prevents costly repairs. Hydrogen Living's support team is here to guide you through every step. Book a free consultation to discuss your device's specific care needs, learn about our countertop systems, and get personalized maintenance recommendations for your household's water type and usage patterns.